CALUMO Web Server Install
The installation of the CALUMO Web Server will perform the following tasks on the machine that it is executed on:
- Install .NET 4.6.2 (if needed)
- Create a new web application inside the “Default Website” in IIS based on the details you supply to the installer
To install the CALUMO Web Server, execute the “CALUMO Web Server.exe” installation file on the web server.
A full log of the installation actions is available in the installation directory that you chose; by default, this is
<installation directory>\CALUMO Webserver Installer.log
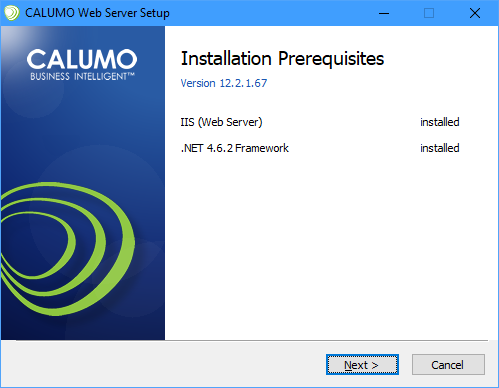
Installation Prerequisites
The prerequisites screen is displayed showing the status of all the required items. If any items are not detected, they will show as “not installed”.
The CALUMO Web Server has two prerequisites:
- IIS (Web Server) – This needs to be installed and configured as per the requirements detailed in CALUMO Web Server before you can install the CALUMO Web Server
- .NET 4.6.2 Framework – This is installed by the installer if it is not detected. You may need to reboot the machine once this has been done. The installer will guide you through this process.
Clicking Next performs the prerequisite checks again and updates the status.
Once all prerequisites show as “installed” you can click Next to continue to the installer welcome page.
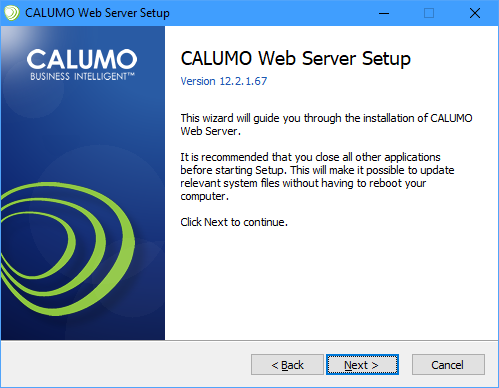
Installation Information
Click Next to continue on to the License Agreement screen.
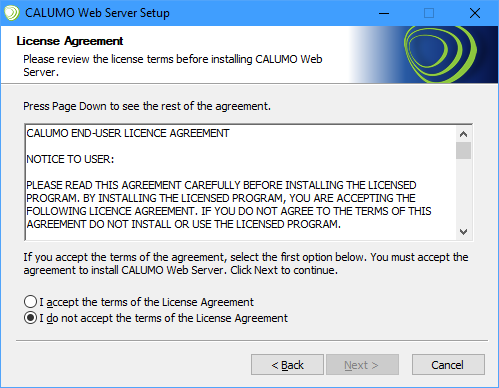
License Agreement
Please read through the CALUMO End-User Licence Agreement (EULA) and if you accept the license agreement, select “I accept the terms of the Licence Agreement” and click Next.
Insallation Location
You are now prompted by the installer to select the location in which you want to place the CALUMO Web Server. You can choose your own location or accept the default location and continue on with the installation by clicking Next.

Web Server Configuration - Part 1
The installer now asks you to configure your CALUMO Web Server installation. Please refer to the following table for a description of each of the fields:
| Field | Description |
|---|---|
| Site Name | This is the name of the website that users will access via http://hostname/sitename |
| AD domain | This is the name of your Active Directory Server that is LDAP enabled. |
| LDAP Connection String | This is any valid LDAP connection string that will retrieve the list of users that you want to be able to select from within the group maintenance |
| LDAP Username | The LDAP username is a login ID giving read access to the LDAP server. |
| LDAP Password | The LDAP password is required for the above user and must not expire. |
| Support Email | This is the email address that errors in CALUMO Office Client will be sent to when they occur and users choose to “Send” them on. You can replace this with an internal email if you want to have a centralized internal collection point for CALUMO and then have that person(s) forward on issues that they cannot solve to CALUMO Support (calumosupport@insightsoftware.com) |
Continue on with the installation by clicking Next.

Web Server Configuration - Part 2
The installer now asks you to configure authentication for your CALUMO Web Server installation. Please refer to the following table for a description of each of the fields:
| Field | Description |
|---|---|
| Website Authentication Mode | Choose between Windows Authentication and Forms authentication. Windows authentication - Users login with their existing AD account. Forms authentication - Users enter a username and password to log into CALUMO. Account information is stored in the CALUMO database. |
| Application Pool Name | Name for the IIS Application Pool that CALUMO will run under. |
| Application Pool Identity | Identity Type that the Application Pool will run under, choose from Application Pool Identity, Local Service, Local System, Network Service or Service Account. |
| Application Pool Username | Username of the Application Pool Identity (Service Account only). |
| Application Pool Password | Password of the Application Pool Identity (Service Account only). |
Continue on with the installation by clicking Next.

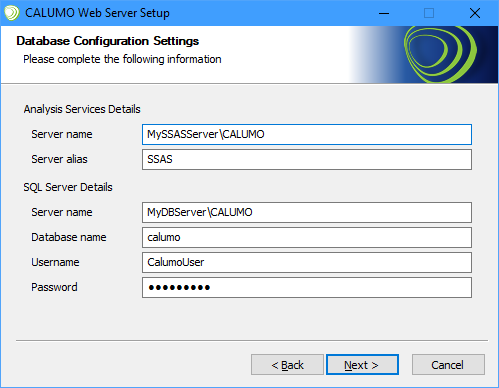
Web Server Configuration - Part 3
The installer now asks you to configure your SASS and SQL Servers for CALUMO. Please refer to the following table for a description of each of the fields:
| Field | Description |
|---|---|
| Analysis Services Server name | This is the name of the server containing the Microsoft SQL Server Analysis Services. |
| Analysis Services Server alias | In this field, you can give the SASS server a user-friendly alias, e.g. “GL cubes”. |
| SQL Server Name | This is the name of the server containing the Microsoft SQL database with the CALUMO application database installed in section 2.1. |
| SQL Database Name | The name of the SQL Server database. |
| SQL Server Username | Username for connecting to the SQL database. |
| SQL Server Password | Password for connecting to the SQL database. |
Continue on with the installation by clicking Next.
Web Server Configuration - Part 4
The installer now asks you to configure your CALUMO Scheduler installation. Please refer to the following table for a description of each of the fields:
| Field | Description |
|---|---|
| Run service as | Account type for the Scheduler Service to run as. Choose from Local System, Local Service, Network Service or Service Account. |
| Username | Username for the account (Service Account only) |
| Password | Password for the account (Service Account only) |
Click next to see the summary of the installation.

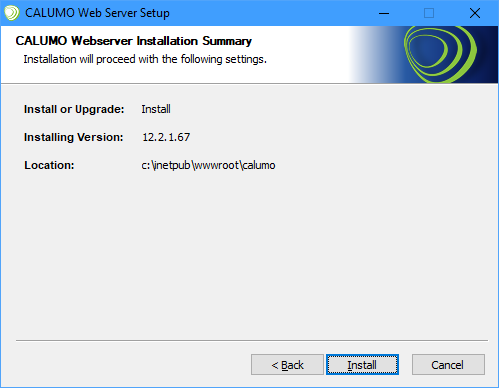
Installation Summary
The installer now shows you the summary of your installation. Click Install to start the installation of the CALUMO Web Server.
If the installation completes successfully, you can click Finish and then exit out of the installer.