CALUMO Application Database Installation
You only need to run the Application Database installer if you are performing a new installation. Read here for more information on automatic database upgrades.
The installation of the CALUMO Application Database will perform the following tasks:
- Install .NET 4.6.2 Framework (if needed)
- Install SqlCmd Tool
- Create a new CALUMO database on the server specified.
- Set the SQL Server into Mixed Mode
- Create a CALUMOUser user if one does not exist and grant it access to the CALUMO database
The installation can be run from any machine. The SqlCmd Tool is installed as a prerequisite and is used to run commands on the Database, whether remote or local.
To perform the install, execute the installation file “CALUMO Application Database.exe” and follow the instructions detailed below.
A full log of the installation actions is available in the installation directory that you chose; by default this is
CALUMO Application Database Installer.log.
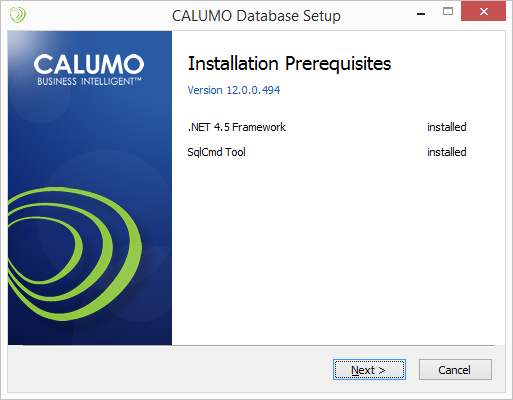
Installation Prerequisites
The prerequisites screen is displayed showing the status of all the required items. If any items are not detected, they will show as “not installed”. The CALUMO Application Database installer has one prerequisite:
- .NET 4.6.2 Framework – This is installed by the installer if it is not detected. You may need to reboot the machine once this has been done. The installer will guide you through this process.
Clicking Next performs the prerequisite checks again and updates the status. Once all prerequisites show as “installed” you can click Next to continue to the installer welcome page.
Installer Welcome
Click Next to continue on to the License Agreement screen.

License Agreement
Please read through the CALUMO End-User Licence Agreement (EULA) and if you accept the license agreement, select “I accept the terms of the Licence Agreement”. Click Next to continue on to the installation location screen.

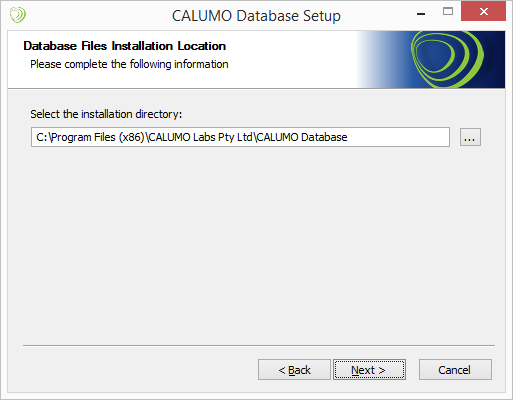
Installation Location
You are now prompted by the installer to select the location in which you want to place the CALUMO Application Database installation files. You can choose your own location or accept the default location. Click Next to continue on to the database server selection screen.
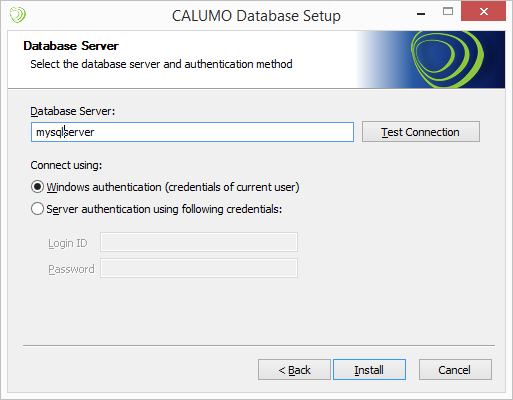
Database Server
You are now shown the database server selection screen where you can specify the database server and credentials that you want to use to connect to that database server.
You can either connect using Windows Authentication which uses the current users’ credentials for the connection, or you can specify a valid SQL Server user id with sufficient access to create and alter databases on the specified server.
You can use the “Test Connection” button to attempt a connection using the server and credentials you have specified. You will receive a response regarding the success of the attempt.
Once you have received a successful response from “Test Connection” click Install to perform the installation. If any errors occur during the installation, you will be notified by the installer and given the details of the error as well as details of how to contact CALUMO Support to assist you in resolving the issue.
Installation Complete
If the installation completes successfully, you can click Finish and then exit out of the installer.