CALUMO Office Client Installation
The installation of the CALUMO Office Client will perform the following tasks on the machine that it is executed on:
- Install .NET 4.6.2 (if needed)
- Install Microsoft Visual Studio Tools for Office (if needed)
- Install an add-in into Microsoft Excel, PowerPoint, and Word
You will find the icon to install the CALUMO Office Client behind the Manage icon in the top right of the CALUMO website.
When you click on this link, you will be prompted to download the installation file and run it on your machine.
When you run the CALUMO Office Client installer, you will be taken through several steps, as detailed below
A full log of the installation actions is available in the installation directory that you chose; by default, this is
<installation directory>\CALUMO Office Client.Installer.log
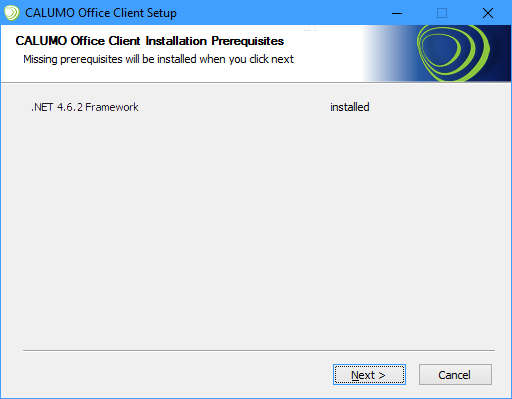
Installation Prerequisites
The prerequisites screen is displayed showing the status of all the required items. If any items are not detected, they will show as “not installed”. The CALUMO Office Client has two prerequisites:
- .NET 4.6.2 Framework – This is installed by the installer if it is not detected. You may need to reboot the machine once this has been done. The installer will guide you through this process.
- .NET VSTO (Tools for Office) – This is installed by the installer if it is not already installed when you hit the “Next” button
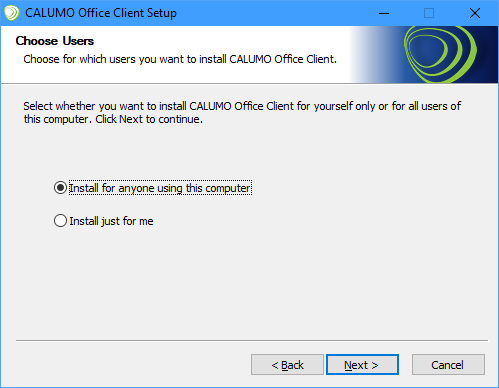
Installation Context
(OPTIONAL STEP)
If you are an administrator on your machine, you are now prompted by the installer to decide how you want to install the CALUMO Office Client.
- “Install for anyone using this computer” is also referred to as “All Users” installation and it will set up a shared version of CALUMO for all users of the computer
- “Install for just me” is also referred to as “Current User” installation and it will set up a version of CALUMO for just the current user.
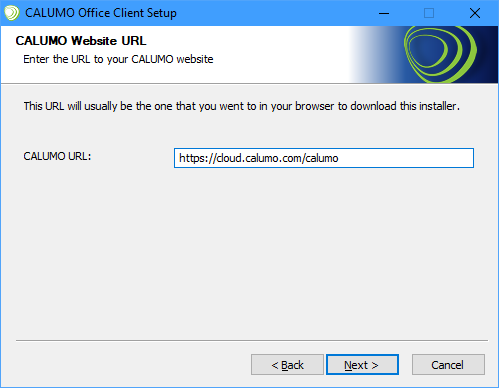
CALUMO Website URL
You are now prompted by the installer to enter the URL to your CALUMO server.
This is important to get right as the installer, during installation, will download missing pre-requisites from this location.
Installation Location
You are now prompted by the installer to select the location in which you want to place the CALUMO Office Client installation files. You can choose your own location or accept the default location and continue on with the installation by clicking Next.
Current User and All Users installations install to different default locations.

Installation Summary
The last page of the installer shows you a summary of what will be performed.
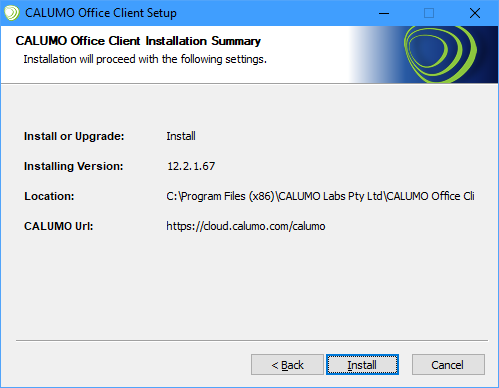
Once the installer has finished, you can close it and open up your Office applications.